728x90
스프링의 CommonMultipartResolver 클래스를 이용하면 여러 개의 파일을 한꺼번에 업로드할 수 있다.
| maxUploadSize | 최대로 업로드 가능한 파일의 크기 설정 |
| maxInMemorySize | 디스크에 임시 파일을 생성하기 전 메모리에 보관할 수 있는 최대 바이트 크기를 설정 |
| defaultEncoding | 전달되는 매개변수의 인코딩을 설정 |
pom.xml
		<!-- 다중 파일 업로드  -->
		<dependency>
		   <groupId>commons-fileupload</groupId>
		   <artifactId>commons-fileupload</artifactId>
		   <version>1.2.1</version>
	 	</dependency>

		<dependency>
		   <groupId>commons-io</groupId>
		   <artifactId>commons-io</artifactId>
		   <version>1.4</version>
		</dependency>
파일 업로드에 필요한 라이브러리를 설치하도록 pom.xml을 작성
servlet-context.xml
	<beans:bean id="multipartResolver" class="org.springframework.web.multipart.commons.CommonsMultipartResolver">
		<beans:property name="maxUploadSize" value="52428800"></beans:property>
		<beans:property name="maxInMemorySize" value="1000000"></beans:property>
		<beans:property name="defaultEncoding" value="utf-8"></beans:property>
	</beans:bean>
CommonsMultipartResolver 클래스를 빈으로 설정
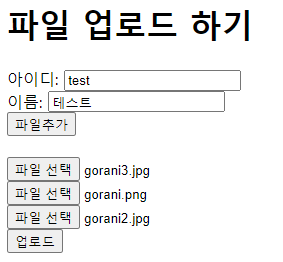
위와 같이 아이디와 이름을 쓰고, 파일을 여러개 추가해서 업로드를 선택하면
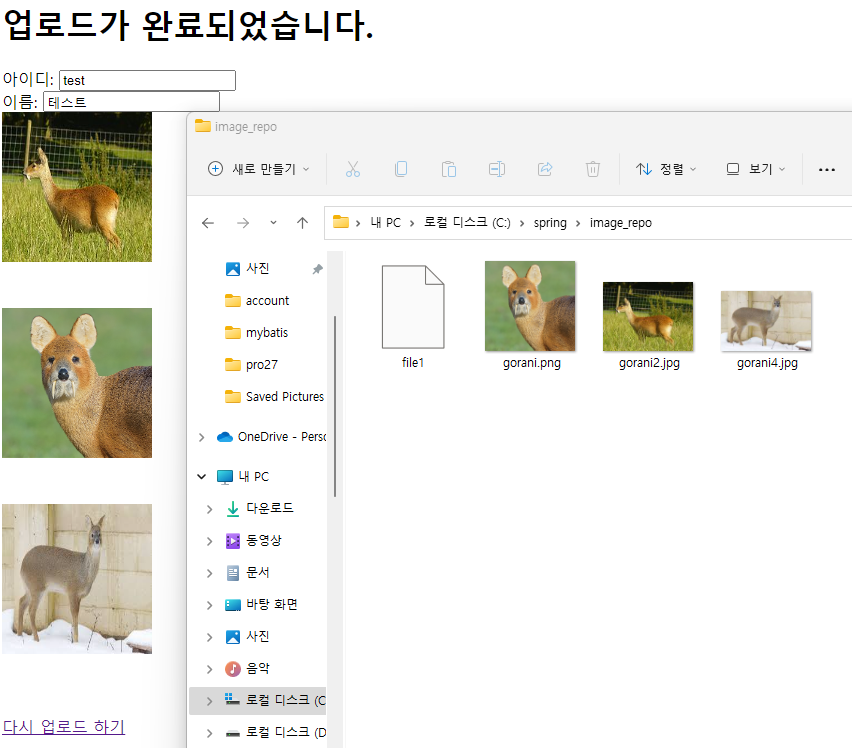
이렇게 업로드한 파일들이 출력되고, 설정한 폴더에 자동으로 업로드 된다.
FileUploadController
@Controller
public class FileUploadController {

	private static String CURR_IMAGE_REPO_PATH = "c:\\spring\\image_repo";

	@RequestMapping("/form")
	public String form() {
		return "uploadForm";
	}

	@RequestMapping(value = "/upload", method = RequestMethod.POST)
	public ModelAndView upload(MultipartHttpServletRequest multipartRequest, HttpServletResponse response) throws Exception{
		multipartRequest.setCharacterEncoding("utf-8");
		Map map = new HashMap();//매개변수 정보와 파일 정보를 저장할 Map 생성
		Enumeration enu = multipartRequest.getParameterNames();

		//전송된 매개변수 값을 key/value로 map에 저장
		while (enu.hasMoreElements()) {
			String name = (String)enu.nextElement();
			String value = multipartRequest.getParameter(name);
			map.put(name, value);
		}
		//파일을 업로드한 후 반환된 파일 이름이 저장된 fileList를 다시 map에 저장
		List fileList = fileProcess(multipartRequest);
		map.put("fileList", fileList);

		ModelAndView mav = new ModelAndView();
		mav.addObject("map", map);
		mav.setViewName("result");
		return mav;
	}

	private List<String> fileProcess(MultipartHttpServletRequest multipartRequest) throws Exception{
		List<String> fileList = new ArrayList<String>();
		Iterator<String> fileNames = multipartRequest.getFileNames();//첨부된 파일 이름을 가져옴

		while (fileNames.hasNext()) {
			String fileName = fileNames.next();
			MultipartFile mFile = multipartRequest.getFile(fileName);//파일 이름에 대한 MultipartFile 객체를 가져옴
			String originalFileName = mFile.getOriginalFilename();//실제 파일 이름 가져옴
			fileList.add(originalFileName);//파일 이름을 하나씩 fileList에 저장

			File file = new File(CURR_IMAGE_REPO_PATH + "\\" + fileName);

			if (mFile.getSize() != 0) {//첨부된 파일이 있는지 체크
				//경로에 파일이 없으면 그 경로에 해당하는 디렉토리를 만든 후 파일을 생성
				if (! file.exists()) {
					if (file.getParentFile().mkdirs()) {
						file.createNewFile();
					}
				}
				//임시로 저장된 multipartFile을 실제 파일로 전송
				mFile.transferTo(new File(CURR_IMAGE_REPO_PATH + "\\" + originalFileName));
			}
		}
		return fileList;//첨부한 파일 이름이 저장된 fileList를 반환
	}
}
FileDownloadController
@Controller
public class FileDownloadController {
	//파일 저장 위치 지정
	private static String CURR_IMAGE_REPO_PATH = "c:\\spring\\image_repo";

	@RequestMapping("/download")			//다운로드할 이미지 파일 이름 전달
	public void download(@RequestParam("imageFileName") String imageFileName, HttpServletRequest request, HttpServletResponse response) throws Exception{

		OutputStream out = response.getOutputStream();
		String downFile = CURR_IMAGE_REPO_PATH + "\\" + imageFileName;
		File file = new File(downFile);//다운로드할 파일 객체 생성

		response.setHeader("Cache-Control", "no-cache");
		//헤더에 파일이름 설정
		response.addHeader("Content-disposition", "attachment; fileName=" + imageFileName);

		FileInputStream in = new FileInputStream(file);
		byte[] buffer = new byte[1024 * 8];

		//버퍼를 이용해 한 번에 8kbyte씩 브라우저로 전송
		while (true) {
			int count = in.read(buffer);
			if (count == -1) break;
			out.write(buffer, 0, count);
		}
		in.close();
		out.close();
	}
}
uploadForm.jsp
<%@ page language="java" contentType="text/html; charset=UTF-8"
    pageEncoding="UTF-8" isELIgnored="false"%>
<%@ taglib prefix="c" uri="http://java.sun.com/jsp/jstl/core"  %>
<c:set var="contextPath"  value="${pageContext.request.contextPath}"  />
<%
  request.setCharacterEncoding("UTF-8");
%>

<!DOCTYPE html >
<html>
<head>
<meta "charset=utf-8">
<title>파일업로드 하기</title>
<script src="http://code.jquery.com/jquery-latest.js"></script>
<script>
	var cnt=1;//파일 업로드 name 값을 다르게 하는 변수
	//파일 추가를 클릭하면 동적으로 파일 업로드를 추가
	//name 속성의 값으로 'file'+cnt를 설정함으로 값을 다르게 설정
	function fn_addFile(){
		$("#d_file").append("<br>"+"<input  type='file' name='file"+cnt+"' />");
		cnt++;
	}
</script>
</head>
<body>
	<h1>파일 업로드 하기</h1>
	<form method="post" action="${contextPath}/upload" enctype="multipart/form-data">
		<label>아이디:</label>
	    <input type="text" name="id"><br>
		<label>이름:</label>
	    <input type="text" name="name"><br>
	    									<!-- 파일 추가를 클릭하면 동적으로 파일 업로드를 추가 -->
		<input type="button"  value="파일추가" onClick="fn_addFile()"/><br>
		<!-- 자바스크립트를 이용해 <div> 태그 안에 파일 업로드를 추가 -->
		<div id="d_file"></div>
		<input type="submit"  value="업로드"/>
	</form>
</body>
</html>
result.jsp
<%@ page language="java" contentType="text/html; charset=UTF-8"
    pageEncoding="UTF-8" isELIgnored="false"%>
<%@ taglib prefix="c" uri="http://java.sun.com/jsp/jstl/core"  %>

<!DOCTYPE html>
<html>
<head>
<meta "charset=UTF-8">
<title>결과창</title>
</head>
<body>
	<h1>업로드가 완료되었습니다.</h1>
	<label>아이디:</label>
	<input type="text" name="id" value="${map.id }" readonly><br>
	<label>이름:</label>
	<input type="text" name="name" value="${map.name }" readonly><br>

	<div class="result-images">
		<!-- 업로드한 파일들을 반복문을 통해 이미지 태그에 표시 -->
	  <c:forEach var="imageFileName" items="${ map.fileList}"  >
	         <img src="${pageContext.request.contextPath }/download?imageFileName=${imageFileName }" style="width:150px; height: 150px;">
	         <br><br><br>
	  </c:forEach>
	</div><p>

	<a href='${pageContext.request.contextPath }/form'> 다시 업로드 하기 </a> </p>
</body>
</html>
728x90
'자바 웹 > 스프링' 카테고리의 다른 글
| 스프링 이메일 사용 (0) | 2022.07.04 |
|---|---|
| 썸네일 이미지 사용 (0) | 2022.07.04 |
| 메이븐과 STS (0) | 2022.07.04 |
| 스프링 애너테이션 기능 (0) | 2022.07.01 |
| 스프링 트랜잭션 (0) | 2022.07.01 |


